Properly cleaning a wild turkey isn’t just about preserving the integrity of the meat for cooking; it’s also an integral part of ensuring food safety. The cleaning process involves meticulous handling to prevent contamination, preserve the flavor, and ensure your meal will be delicious and safe to eat.
The following is a step-by-step guide on how to clean a wild turkey. Whether you’re a seasoned hunter or a beginner, these steps will guide you in processing your wild turkey correctly, from plucking the feathers to properly disposing of waste. Let’s delve into it.
1. Gather the necessary tools and equipment
Before embarking on the task of cleaning a wild turkey, you need to equip yourself with the proper tools. Cleaning is a hands-on task that requires some degree of precision, and the right tools can make the job easier and more efficient.
Your toolbox should include a sharp knife for precise cuts, a large table for the workspace, a large pot of water for scalding (optional), latex gloves to maintain hygiene, a cooler with ice for storage, and durable plastic bags for waste disposal. Additionally, you may need a small saw or a pair of robust shears for more challenging tasks such as cutting through bone.
2. Prepare the workspace
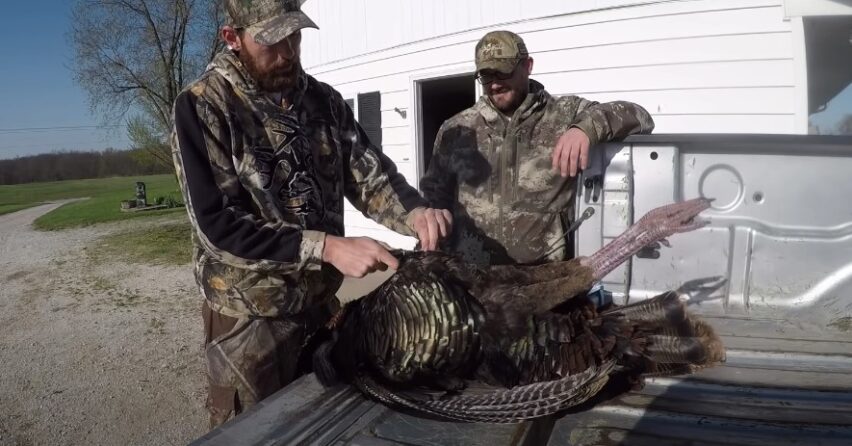
The workspace you select for cleaning your wild turkey is as important as the tools you use. A clean, spacious area will not only make the task easier but also ensures that the meat isn’t contaminated. Start by cleaning the area thoroughly to eliminate any contaminants.
An outdoor table is an ideal space, as it provides plenty of room and makes clean-up easier. Ensure the table surface is smooth and easy to clean – metal or plastic is ideal. Remember, cleanliness is crucial in maintaining the quality of the meat and avoiding foodborne illnesses. This is especially important when dealing with wild game as they can carry bacteria and parasites that can be harmful if ingested.
3. Remove feathers
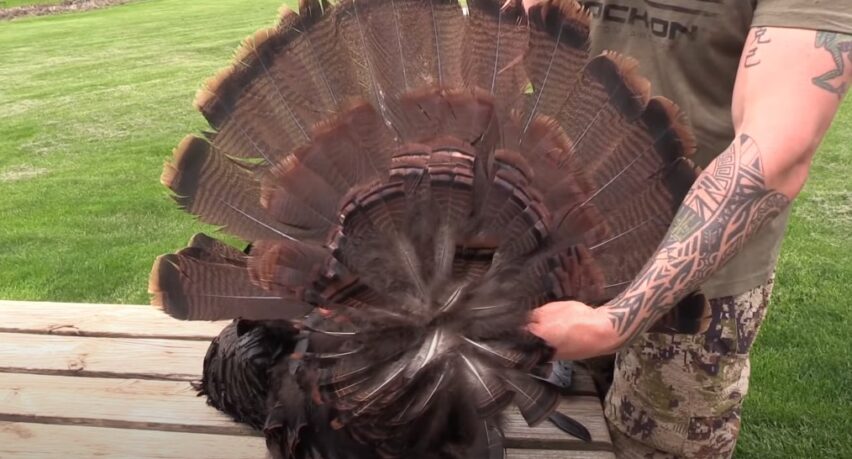
Now onto the cleaning process itself. The first step is to remove the feathers, which can be done by either plucking or skinning. While skinning is quicker, plucking preserves the skin, which adds flavor and prevents the meat from drying out during cooking. If you choose to pluck, start by scalding the turkey in a large pot of boiling water for a few minutes. This will loosen the feathers and make them easier to remove.
Start from the tail and work your way towards the head, removing one feather at a time. Be gentle in order to avoid tearing the skin. While plucking is more time-consuming, the flavorful results make it worth the effort. Regardless of the method you choose, removing the feathers is an essential step in cleaning a wild turkey.
4. Remove the head and neck
Once the feathers are removed, the next step is to remove the head and neck. Precision is crucial in this step to preserve as much meat as possible. Start by laying the turkey on its back. Locate the base of the neck and make a clean cut through, severing the head from the body.
Proceed to cut off the neck close to the body, taking care not to puncture the crop (a sac-like extension of the bird’s gullet where food is stored). The neck can be saved and used for making stock. The process of removing the head and neck is delicate, but with a little practice, you will become more proficient.
5. Make an incision and remove internal organs
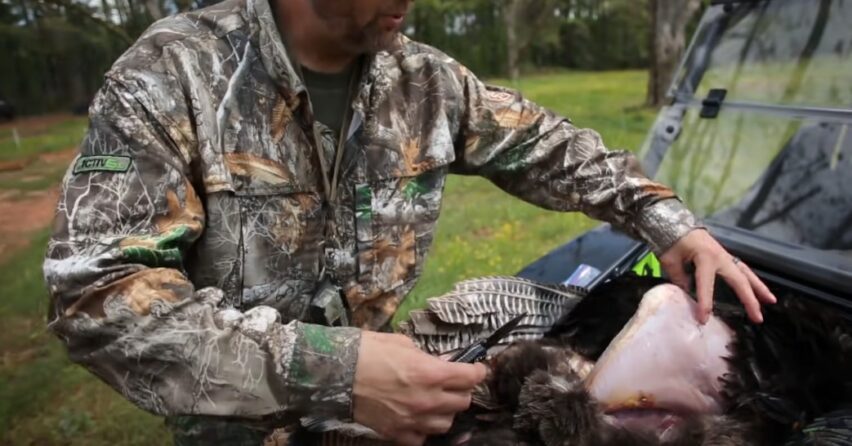
With the head and neck removed, the next step is to access the internal cavity of the turkey. This is done by making an incision at the bottom of the turkey, being careful not to puncture the intestines as this can contaminate the meat. Reach in and carefully remove the internal organs, including the heart, liver, and gizzard. These can be set aside if you wish to use them for gravy or other dishes.
Be thorough in your removal to ensure no remnants are left inside the turkey. This process may seem complex, but it is crucial for preparing your turkey. Remember, patience and care are essential to avoid damaging the meat and to ensure your turkey is properly cleaned.
6. Clean and rinse
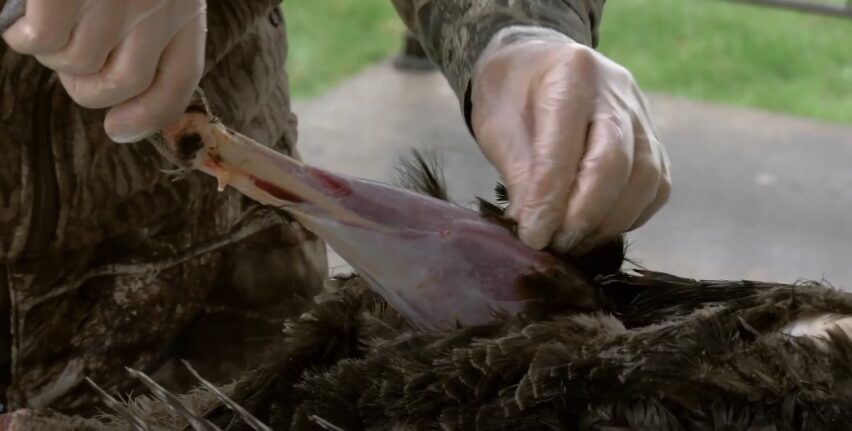
Once the internal organs are removed, it’s time to clean the turkey. This step is essential to remove any remaining blood or debris and to ensure the meat is ready for cooking or storage. Start by rinsing the internal cavity with cold water, ensuring that all parts of the bird are thoroughly cleaned. It’s important to be thorough and meticulous during this process, as any remaining debris can affect the flavor of the meat and pose potential health risks.
7. Drying and Storing
Now that your turkey is clean, it’s essential to dry and store it properly to maintain its quality. This step is crucial for food safety and preserving the flavor of the meat. After patting dry the turkey, leave it to air dry for a few minutes before storage.
For storage, place it in a large cooler filled with ice or store it in the refrigerator if you plan to cook it within a few days. Remember, proper storage is as critical as cleaning when it comes to ensuring the quality of your turkey. Make sure to keep the bird at a safe temperature to prevent bacterial growth.
8. Dispose of waste properly
The process of cleaning a wild turkey results in a fair amount of waste. Disposing of this waste responsibly is essential to protect the environment and keep your workspace clean. Feathers can be composted or disposed of in a sealed plastic bag in your regular trash. The internal organs and other parts not used for cooking should be disposed of in a similar manner.
Responsible waste disposal is part of the hunter’s code of ethics. By doing this, you are not only maintaining cleanliness but also respecting nature and the ecosystem.
9. Practice food safety
Food safety is of utmost importance when cleaning and handling wild game. Missteps can lead to foodborne illnesses, which can be severe. Always wear gloves when cleaning your turkey, wash your hands frequently, and sanitize all tools and surfaces that come into contact with the turkey.
Also, ensure the turkey is properly cooked to kill any potential bacteria or parasites. The thrill of hunting and the joy of a delicious meal comes with the responsibility of handling the game safely and responsibly. Food safety should be a top priority at all stages of processing your wild turkey.
Consider additional processing options
Finally, remember that there are numerous ways to process and prepare your wild turkey. Depending on your personal preference and culinary plans, you might opt for different techniques. For instance, some hunters prefer skinning their turkeys instead of plucking.
Others may choose to quarter the bird for easier storage and cooking. It’s also worth noting that different cooking methods – roasting, smoking, frying – might require different preparation methods. Remember, the end goal is a safe, delicious meal, so choose the processing options that align best with your culinary ambitions.
If you’re hoping to go on an animal hunt you have to be prepared. You can read our article on choosing arrows for a compound bow here.
FAQs
How long should I let the turkey air dry before storing it?
It is recommended to let the turkey air dry for at least 10-15 minutes before storing. This allows excess moisture to evaporate and promotes better storage and preservation of the meat.
Can I freeze the turkey immediately after cleaning?
While you can freeze the turkey immediately after cleaning, it is best to allow it to air dry for a short period. This helps ensure better texture and reduces the risk of ice crystals forming on the meat, which can affect its quality.
How long can I store a cleaned turkey in the refrigerator?
A cleaned turkey can be safely stored in the refrigerator for up to three days. Make sure to place it in airtight containers or wrap it tightly in plastic wrap to prevent exposure to air and odors.
Can I bury the waste in my backyard?
Burying the waste in your backyard is generally not recommended. It can attract unwanted pests and may not adhere to local regulations. It is better to dispose of waste, such as feathers and internal organs, in sealed plastic bags and discard them in the regular trash.
What temperature should I cook the wild turkey to ensure it’s safe to eat?
The USDA recommends cooking wild turkey to an internal temperature of at least 165°F (74°C) to ensure it’s safe to eat. Use a meat thermometer to accurately gauge the temperature at the thickest part of the bird.
Can I marinate the cleaned turkey before cooking?
Certainly! Marinating the cleaned turkey can enhance its flavor and tenderness. Choose a marinade that complements the wild game’s natural flavors and follow the recommended marinating time to avoid over-tenderizing the meat. Remember, if you have any concerns or questions about cleaning and preparing a wild turkey, it is always a good idea to consult with experienced hunters or local experts who can provide guidance specific to your region and circumstances.
Conclusion
Cleaning a wild turkey can seem like a daunting task, but with the right tools, preparation, and a bit of patience, it’s an achievable task that can even become enjoyable. By following the steps outlined in this guide, you will ensure that your wild turkey is cleaned properly, ensuring a delicious, safe meal.
Remember, the key to cleaning a wild turkey lies in the details – the preparation of your workspace, the careful handling of the bird, and the diligent practice of food safety. These steps, when done correctly, culminate in the ultimate reward – a delectable meal that you procured and prepared yourself, from field to table. Happy hunting, and even happier cooking!

